 |
|
#111
|
|||
|
|||
|
Quote:
I used 14awg and some 12awg on the bigger stuff. You can see from pics how it turned out. You may want to leave a space to put the shoulder of your heat shrinks so you don’t have a mishap like I did on the blower label. The R in blower is bigger because I didn’t leave room at bottom for shoulder… oh well I’m only one who knows or cares I suppose. But I’m still tempted to redo it. |
|
#112
|
|||
|
|||
|
I ended up using the flat label and clear shrink on some bigger wire.
|
|
#113
|
|||
|
|||
|
So I’ve been racking my brain on how to see data in real time like a Holley term. X gives you.
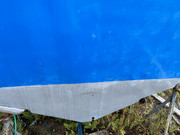
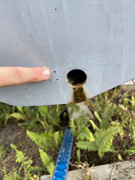
There’s a Bluetooth obd2 port scanner and an app called torque. If you use an android device you can see this in real time. A lot of car guys use this. I’m going to get one of these so i can trouble shoot some gauges and find out hp rating. In meanwhile, I’ve figured out where and how I’m going to mount the B3. I’m going to move the AV plate 2” above the keel. That means. My transom is 16 degrees. Check yours but that’s mine. The x dimension is 13 9/16” with a framing square OR 14 5/16” up from keel with a tape measure. They land in nearly the same place. Then I’m adding 2” to that. Now full disclosure. Merc says only move it 1”. BUT it’s a whole lot cheaper and less work to buy a spacer to drop the leg down than to move that transom assy up. I also gain 2” of working room which is nice. You’ll see 2 black dots in the pic. And my finger is pointing at 2.5” on both I believe but 2” seems to be the braintrusts suggestion. I will bow to the superior knowledge and experience.    Ps my buddies around here are dying for me to get this done. I need to get b3 rebuild kits. I need upper and lower gears. It was a 2:1 and I anticipate keeping that but suggestions are welcome. |
|
#114
|
|||
|
|||
|
|
|
#115
|
|||
|
|||
|
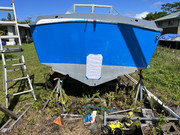
So here it is with template cut down
 I measured from center of pad 2” I think? Then I measured beam to beam and then chine to chine all lined up very close to my center line of pad. Within a 1/8-1/4” or less. One of those other marks hit my line exactly… Again this is the X dimension of 14 5/16” +2” so 16 5/16” on the center hole or x dimension. Here’s the dry fit of the transom assembly. Need to let stuff dry and cure and rains rolling in. I want to glass around the cutout and the holes to prevent water intrusion. Will report back when can. 
|
|
#116
|
|||
|
|||
|
|
 |
|
|