
 |
|
#71
|
|||
|
|||
|
Strick,
thanks for the compliments. I've reviewed your posts many times for ideas and guidance during my project. I even joined the "two" SeaCraft club last week with the purchase of a '71 Seafari. Not sure if I'm going to keep or not since I was mainly after the trailer but it sure feels good for now!!
__________________
Will |
|
#72
|
|||
|
|||
|
Quote:
 strick
__________________
"I always wanted to piss in the Rhine" (General George Patton upon entering Germany) |
|
#73
|
|||
|
|||
|
I have been working on my fuel tank coffin and bulkheads the last few days. I installed the slats and temporarily laid in the 1/8" neoprene (60 Durometer) strips.
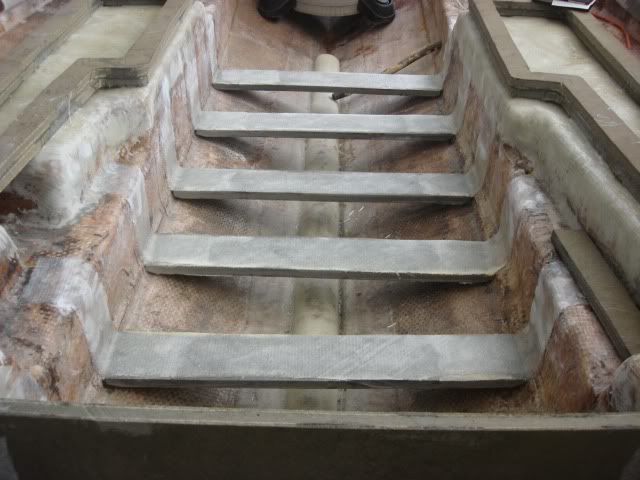 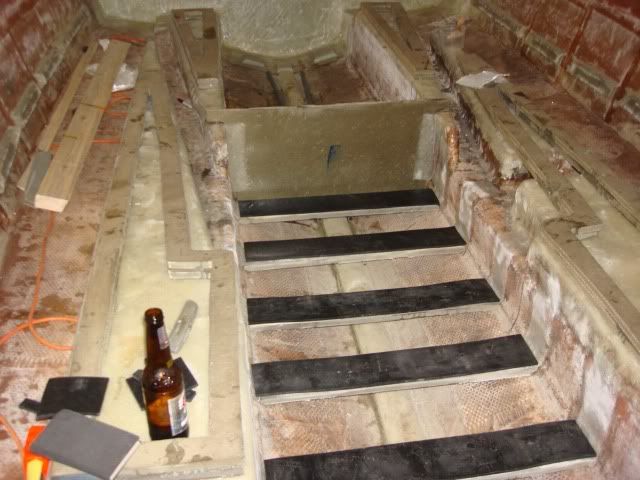 I need to know if these are strong so here I am standing on two of the six. I go about 220 so I pretty comfortable with the installation. Nevertheless, I added more cloth in the corners and another layer across each slat for maximum strength. 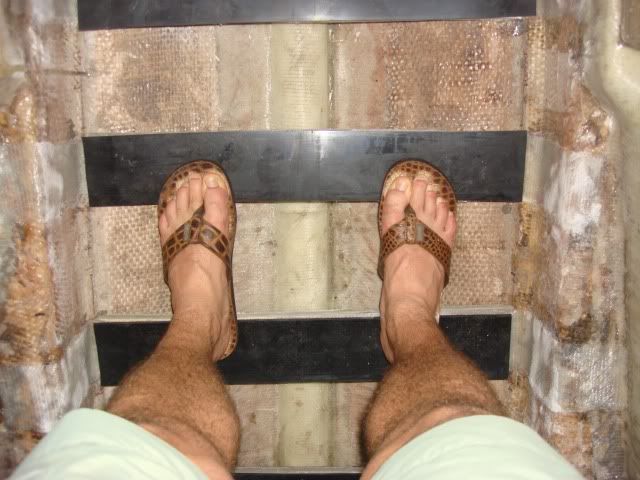 In this photo I've laid in two PVC Sch 80 1/2" pipes to drain the fuel coffin in the event of any water intrusion. These will pass under the area for my rear fishbox that will be foamed in. 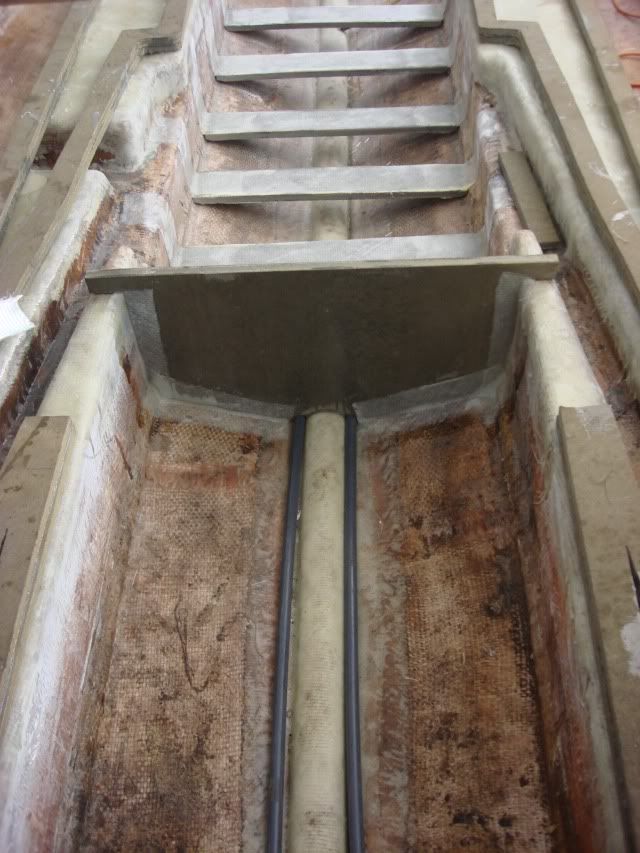 Added the first and second layers of matt to the rear access. This will be glassed in shortly. You'll notice where I've added the holes that the cockpit drains will be mounted in. 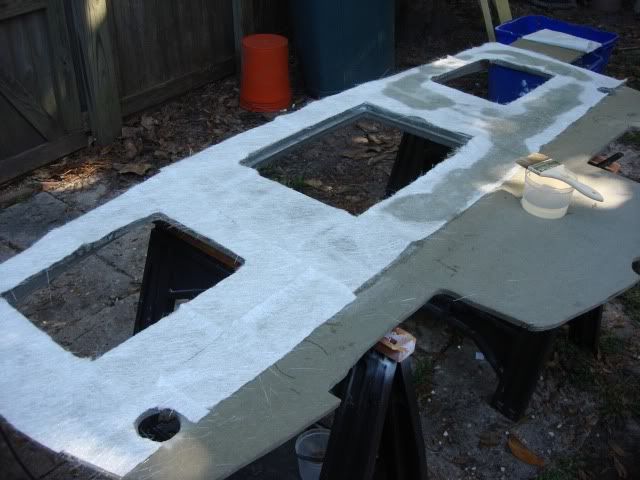 You can also see the door for the middle opening in this pic. 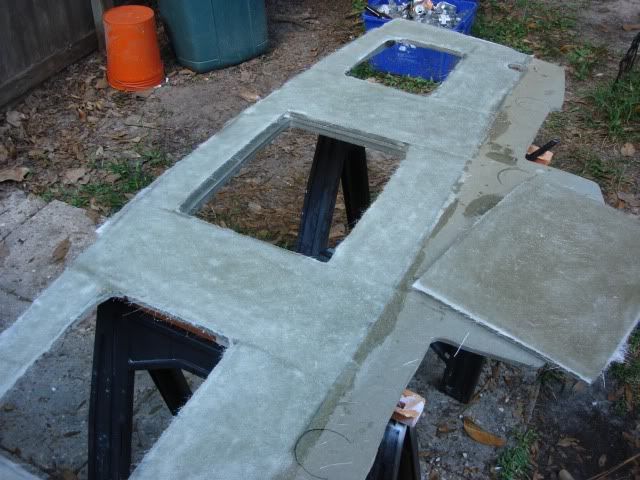
__________________
Will |
|
#74
|
|||
|
|||
|
Had a chance to get some stuff done this weekend. I primed and painted my fuel tank after hitting it with 150 grit sandpaper. This was my first experience with a spray gun and it went pretty well. I suspended it from some scaffolding so I could work around it easily.
 I also used BilgeKote to paint my fuel cell and rear bilge area. 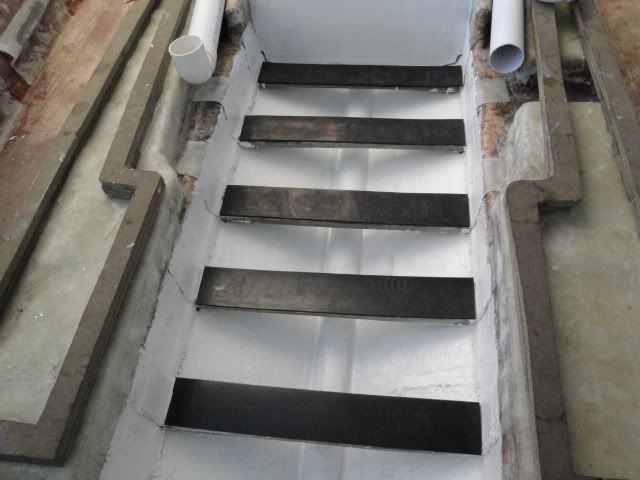 I added a partition to seperate the area where the fuel filter will be mounted from the bilge and washdown pumps. Wasn't sure if this was a coast guard requirement but thought it might not be a bad idea to isolate the fuel filter in the event any vapors might be ignited by some of the electrical components . You can see the hole where the rigging tube will pass through. Also added another strut that will later help support the rear cap as well as add lateral strength. 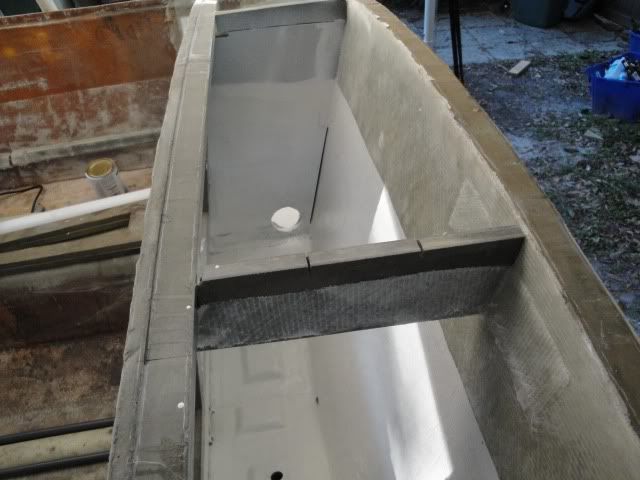
__________________
Will |
|
#75
|
|||
|
|||
|
Looking good!
|
|
#76
|
|||
|
|||
|
Ron,
Awlgrip is not something to be trifled with. That said, probably the most important prevention is a managed source of clean breathable air. The fumes and the product itself is what is dangerous. It attacks the liver. And it is nasty stuff if it reaches the liver. It is an excellent product and can probably be managed in a brush or roller application process with quality VOC filtration capability. It is when we began to spray it and risk the inhalation of the fumes and the product itself that things get really dicey. If you intend a spray it, spend the time it takes to get yourself familiar with proper precautions. Good luck.
__________________
Getting home is more important than getting there! Plan accordingly! |
|
#77
|
|||
|
|||
|
A couple more pics. I've installed the rigging tubes and getting ready to install the fuel tank. In the second picture you can see the stainless unistrut I fastened to the stringers. There are four of these and will be used to fasten the tank in place.
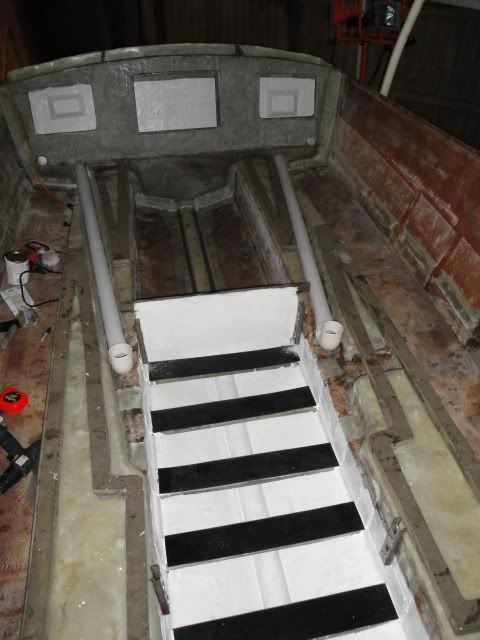 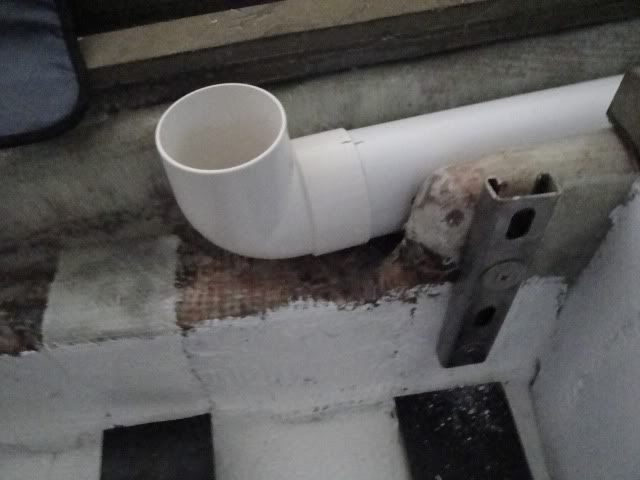 Rigging tube passing through the fuel filter compartment. 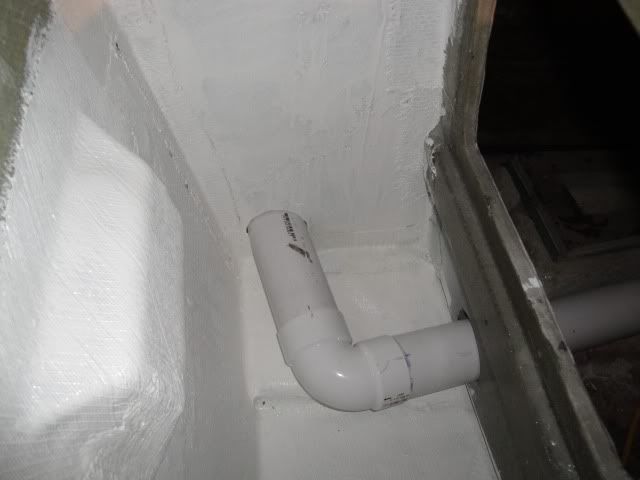 I used a hole saw to drill out the rear drain. You can see where the new one was centered vs. the one from the factory. I guess that mass production doesn't lend itself to the same tolerances of someone in the backyard. 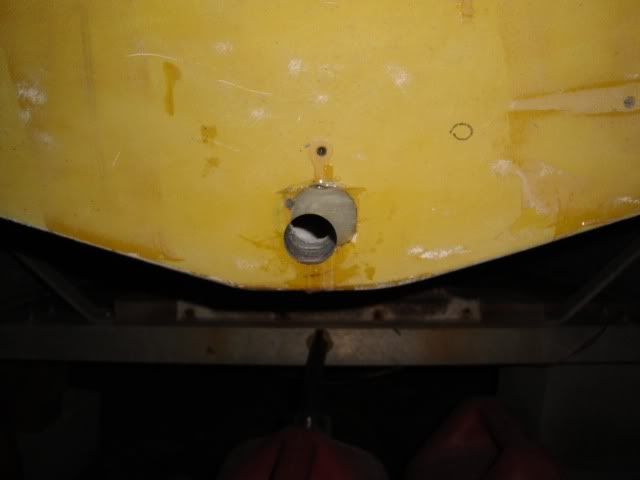
__________________
Will |
|
#78
|
|||
|
|||
|
I'm assuming that PVC pipe goes back to the bracket compartment and all the rigging passes thru it? If that is the case, that 90 might cause you some grief, particuliarly with the shift/throttle cables, I would opt for a sweep 90. Rest of it looks right nice.
|
|
#79
|
|||
|
|||
|
Caymanboy, the rigging tube terminates into the bilge compartment which would then leave the exposed cables to turn into the opening in the transom to access the bracket. Per someone else's recommendation on this forum I used the thinner wall DWV PVC because it weighs less but also couldn't locate a longer radius "sweep" that you describe. I need to investigate further because I don't need that to become a problem when I get to the point of pulling cables. Thanks for your advice.
__________________
Will |
|
#80
|
|||
|
|||
|
Will with that rigging tube you might want to use 2 45s instead. I dont think the throttle cable will bend that much on the ends. with the 2 45s you will use the holes you already drilled just space the 2 45s with a 4" peice between them. Problem solved.
__________________
36' Yellowfin 1972 20' seacraft 140 suzuki http://www.classicseacraft.com/commu...ad.php?t=18607 |
 |
| Thread Tools | Search this Thread |
| Display Modes | |
|
|